#11-WordPress-Tips-HOMEPAGE

WordPress Homepage Customization – WordPress Tips #11

Welcome to part 11 of our WordPress Tips series, brought to you by 2X Sales, your go-to ad agency in Spokane, WA, and North Idaho. This installment zooms in on Homepage Customization, a crucial skill for enhancing your website’s appeal and functionality. If you looking to make a strong first impression online, mastering your WordPress homepage is key. Did you miss our earlier tips on robust hosting solutions and image optimization? Catch up with our posts on WordPress Hosting Tips and Image Optimization Techniques to boost your site’s performance and SEO.

Today, we focus on tailoring your homepage to draw in visitors and reflect your brand’s unique identity and values. From choosing the right templates to optimizing content for search engines and user engagement, we’ll guide you through making your homepage a powerful entry point to your site. Stay tuned to transform your homepage into a conversion machine that 2Xs your sales.

Key Takeaways

  • Choose between a static or dynamic homepage to best represent your brand and content.
  • Utilize templates and page builders for professional, hassle-free homepage customization.
  • Incorporate design elements that reflect your brand identity and enhance visual appeal.
  • Optimize homepage content for user engagement, SEO, and a seamless user experience.
  • Regularly update and experiment with your homepage design to keep it fresh and engaging.

Understanding the Basics of WordPress Homepage Customization

Choosing Between Static and Dynamic Homepages

When deciding on the type of homepage for your WordPress site, it’s essential to understand the difference between static and dynamic options. A static homepage remains constant, showcasing the same content each time it’s visited, which can be ideal for businesses wanting to control their brand message. In contrast, a dynamic homepage updates automatically with your latest posts, keeping content fresh and engaging for repeat visitors.

  • Static Homepage Advantages:
    • Consistent user experience
    • Focused brand messaging
    • Easy to manage
  • Dynamic Homepage Advantages:
    • Fresh content for visitors
    • Automatic updates with new posts
    • Engages users with a variety of content

Choosing the right type of homepage is a strategic decision that can significantly affect how visitors interact with your site. It’s not just about aesthetics; it’s about functionality and purpose. Whether you aim for a reliable brand presence or a lively content feed, your choice will shape the user’s journey from the moment they land on your page.

Remember to manage WordPress categories effectively by reviewing, deleting, merging, and auditing them regularly. This will help organize your site structure, leverage tags, and maintain a clean and user-friendly website for improved usability and SEO.

Leveraging Templates for Professional Layouts

WordPress offers a plethora of professional templates that can be the cornerstone of a polished and effective homepage. These templates provide a structured foundation, allowing you to infuse professionalism into your site with minimal effort. By selecting a template aligned with your brand’s aesthetic and functional needs, you can bypass the complexities of starting from scratch.

Templates are not just about aesthetics; they’re about providing a consistent user experience that resonates with your audience.

To ensure your template choice enhances your homepage, consider the following steps:

  • Evaluate the template’s responsiveness to ensure it looks great on all devices.
  • Assess the customization options available to make sure you can tailor it to your needs.
  • Check for pre-built elements that suit your content strategy, such as sliders, contact forms, or social media integrations.
  • Simplify the design by removing unnecessary elements that may clutter the user experience or slow down your site.

Remember, a template should serve as a starting point. Personalizing and optimizing it is essential to create a unique web presence that stands out in the digital landscape.

Editing and Enhancing Design Elements

When it comes to editing and enhancing design elements on your WordPress homepage, it’s essential to focus on aesthetics and functionality. The goal is to create a balance that provides a seamless user experience.

To start, consider the following steps:

  • Use the WordPress Theme Customizer for real-time edits.
  • Edit your homepage with the Block Editor for more granular control.
  • Implement a Page Builder Plugin for advanced design options.

Remember, the key is to enhance user experience and engagement while maintaining your site’s performance.

Optimizing images and media is crucial; large files can slow down your site, while optimized images improve loading speed without sacrificing quality. Additionally, leveraging design principles such as Hick’s Law and the Rule of Thirds can guide users’ attention to important elements. Lastly, always reflect your brand identity through consistent design choices, creating a cohesive and memorable homepage.

Advanced Tips for Optimizing Your WordPress Homepage

WordPress Homepage

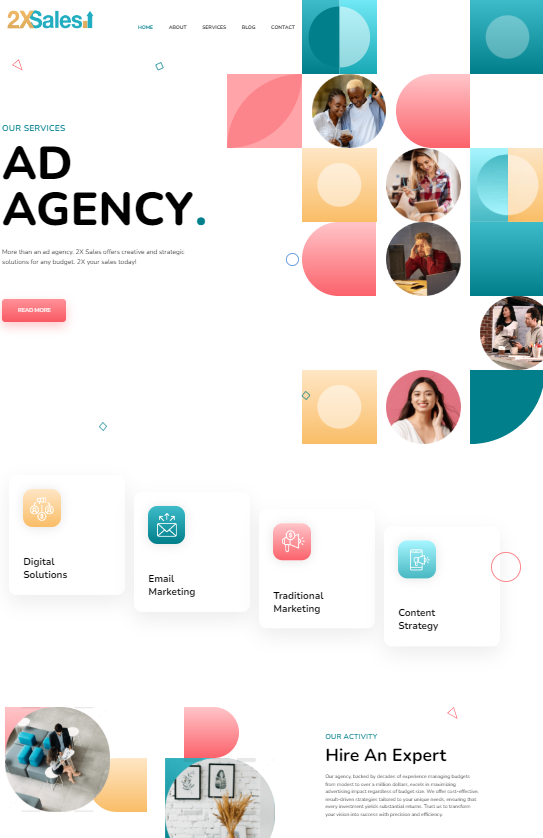
Creating a Custom, Brand-Tailored Static Page

Creating a custom homepage pivotal in ensuring your website stands out and represents your brand. It’s not just about aesthetics; it’s about creating a space that embodies your brand’s values and mission.

To start, select a template that aligns with your brand’s visual identity. This will serve as the foundation for your homepage’s structure and style. Next, infuse your homepage with elements that are quintessentially ‘you’—from the images and fonts to the color scheme and overall layout.

Remember, the goal is to make your homepage visually appealing and intuitive for your visitors. Here’s a simple guide to setting your static homepage:

  1. Open your WordPress Dashboard.
  2. Create your Homepage.
  3. Go to Settings → Reading.
  4. Select the page that you want to set as your static homepage.
  5. Save your changes to apply the new settings.

By taking control of your homepage design, you can ensure that every visitor’s first impression is a true reflection of your brand.

Keep in mind that a well-designed homepage can improve user navigation, making it easier for visitors to engage with your content and explore your offerings. It’s not just about making a good first impression; it’s about creating a lasting one.

Utilizing Page Builders for Streamlined Customization

Page builders are a game-changer for WordPress users looking to customize their home page with ease. Streamline customization with a page builder tool for a visually stunning and user-friendly design, without the need for extensive coding knowledge. These tools offer a drag-and-drop interface that simplifies the design process, allowing you to create a unique and engaging user experience.

By incorporating a page builder plugin, you can tailor every aspect of your homepage to align with your brand identity. This approach not only enhances the visual appeal but also ensures that your message is effectively communicated to your audience.

Here’s a quick guide to the benefits of using page builders:

  • Ease of use: Intuitive drag-and-drop interfaces make it simple to design your homepage.
  • Customization: Access a wide range of elements to create a custom look.
  • No coding required: Achieve professional results without coding expertise.
  • Responsive design: Ensure your homepage looks great on all devices.
  • SEO-friendly: Many page builders have built-in SEO tools to help improve your site’s visibility.

Remember, the right page builder can make a difference in how visitors perceive your site. As highlighted in the article 19 Best WordPress Page Builders Reviewed (2024 Expert Pick), popular plugins like SeedProd, Thrive Themes, Divi, and others have been tried and tested, proving their worth in the market.

Optimizing Content for User Engagement and SEO

To ensure your WordPress homepage attracts visitors and keeps them engaged, content optimization is key. This involves crafting content that is readable, well-structured, and of optimized length. Use simple language, short paragraphs, and bullet points to enhance scannability. Clear headings should be used to break the content into digestible sections, ensuring a smooth flow.

Be prepared to make further adjustments based on performance data. SEO is an iterative process, and it may take several tweaks to find the optimal strategy for your homepage.

Optimizing metadata is crucial for improving click-through rates from search results. A compelling meta title and description act as a preview of your content, enticing users to click through to your site. Additionally, configuring canonical tags is essential to prevent issues with duplicate content, which can dilute your SEO efforts.

Remember, speed is a critical aspect of user experience. It directly impacts user engagement, conversions, and SEO rankings. Implement strategies such as image optimization, caching, and selecting quality hosting to enhance site performance and user experience.

How to Set a Static WordPress Homepage

Accessing the WordPress Admin Area

To begin customizing your WordPress homepage, the first step is to access the WordPress admin area. Log in to your WordPress dashboard using your username and password. This area is the control center for all your website’s content and settings.

Once logged in, navigate to the ‘Pages’ section where you’ll find a list of all the pages on your website. Here’s a simple guide to help you locate and edit your homepage:

  1. Go to ‘Pages’ and identify the page set as your homepage.
  2. Click on the page to open the editor.
  3. Look for the ‘Page Attributes’ section on the right-hand side.
  4. In the ‘Template’ dropdown, you can choose a new template for your homepage.
  5. Don’t forget to ‘Update’ or ‘Publish’ the page to save your changes.

Remember, the homepage is often the first impression visitors have of your site, so take the time to ensure it’s set up to reflect your brand and message effectively.

Editing the Default WordPress Homepage

Once you’ve decided to edit your default homepage, the process is straightforward. Log in to your WordPress dashboard and navigate to the ‘Pages’ section. Here, you’ll find the page currently set as your homepage. Click to edit it and look for the ‘Page Attributes’ box, usually located on the right-hand side of the editor. Within this box, you’ll see the ‘Template’ dropdown menu, where you can select a new template that better suits your vision for the homepage.

Remember to regularly review and delete unused plugins to improve your site’s speed, security, and user experience. Embrace minimalism and quality plugins for optimal performance.

After selecting a new template, don’t forget to update or publish the page to apply the changes. This action ensures that your homepage reflects the new design immediately. If you’re using a static page as your homepage, ensure that it’s selected in the ‘Reading’ settings under the ‘Your homepage displays’ section. Save the changes to finalize the setup.

Applying a New Template

Once you’ve decided on a new look for your WordPress homepage, applying a new template is straightforward. Navigate to the ‘Page Attributes’ section within the page editor to find the ‘Template’ dropdown menu. Here, you can select from any of the available templates, including any custom template you’ve created specifically for your site. Remember, only custom templates will be available for selection alongside the default options.

To ensure a smooth transition, follow these steps:

  1. Log in to your WordPress dashboard.
  2. Go to ‘Pages’ and select your current homepage.
  3. Click to edit the page.
  4. In the ‘Page Attributes’ box, choose your new template from the dropdown.
  5. Click ‘Update’ or ‘Publish’ to apply the changes.

By carefully selecting and applying a new template, you can significantly enhance your site’s appeal without the need for extensive coding or design experience. This simple change can make a lasting impact on your audience’s experience.

Customizing Your WordPress Homepage Design

WordPress Customization

Reflecting Brand Identity with Design Choices

Your homepage is the digital front door to your brand, and it must reflect your brand’s identity. Choose a color scheme that resonates with your brand’s vision, using tools like Pinterest to curate the perfect palette. Remember, contrast is your friend; it ensures that text, headlines, and call-to-action buttons stand out against the background, making them easily noticeable and readable.

Incorporate design elements that enhance the visual appeal and reinforce your brand identity. This could include the use of specific fonts, imagery, and layout choices that align with your brand’s message and values. For example, using high-quality images can make a powerful first impression, while the strategic use of faces in imagery can build familiarity and trust with your audience.

By thoughtfully customizing your homepage design, you create a cohesive and memorable experience for your visitors, encouraging them to engage with your content and, ultimately, your brand.

Remember to group key elements like the headline, description, and opt-in button closely together, following Gestalt’s similarity principle for a more organized and conversion-friendly user experience. This attention to detail in design enhances user engagement and plays a pivotal role in optimizing your homepage for both aesthetics and functionality.

Making a Lasting Impression with Visuals

To make a lasting impression with visuals on your WordPress homepage, it’s essential to use high-quality images that resonate with your audience. High-resolution images captivate visitors and convey professionalism and attention to detail. Remember, 60% of buyers are more inclined to interact with brands that showcase images, highlighting the power of visual appeal.

Optimizing images and media is crucial for a balance between aesthetics and website performance. Large images can slow down your site, while optimized images provide a seamless experience. Here are some techniques to consider:

  • Compress images to reduce file size without losing quality.
  • Choose the right file format (e.g., JPEG, PNG) for different types of images.
  • Implement lazy loading to defer the loading of off-screen images.

Faces are a powerful element in web design. Including them on your homepage can build familiarity and trust with your visitors. When people see faces, they’re more likely to empathize and feel connected to your brand.

Avoid using generic stock photos that fail to represent your brand’s unique personality. Instead, select relatable images and reflect the essence of your brand, turning your website into a conversion machine.

Experimenting with Design Elements for Standout Homepages

When customizing your WordPress homepage, it’s essential to experiment with various design elements to create a unique and memorable experience for your visitors. Consider the strategic placement of key components such as product images, CTAs, and subscription buttons. For instance, using contrasting colors for important buttons can significantly enhance their visibility and effectiveness.

  • Product images should be positioned to complement your copy and CTAs.
  • CTAs need to be placed in high-visibility areas to improve conversion rates.
  • Subscription buttons should use standout colors to draw attention.

Embrace the freedom to try new layouts and design tweaks. A/B testing can be a powerful tool to determine what resonates best with your audience.

Remember to optimize your WordPress site with image compression, lazy loading, browser caching, and CDN usage. There are recommended plugins for image optimization and enhancing user experience, as well as professional services available for assistance. The goal is to create a homepage that not only looks great but also performs efficiently.

Need WordPress Help?

In wrapping this up, let’s just say the path to Homepage Customization in WordPress is… well, it’s a bit of a maze, isn’t it? Not everyone’s cup of tea, especially when you’re trying to juggle the aesthetics, the backend, and everything in between. It’s almost as if, amidst the sea of plugins and templates, your perfect homepage is just a myth. But hey, let’s not despair. 2X Sales have been down this road a few times, offering a lifeline to those adrift in the WordPress wilderness.

Based out of Spokane, WA, and has left footprints all over North Idaho, 2X Sales has this WordPress Web Design service, touted to turn your homepage from a bland entry point into something of a digital masterpiece. They claim to understand the intricate dance of blending brand essence with user engagement, a claim many could only wish to make. If the daunting task of elevating your WordPress site has been keeping you up at night, or if you simply fancy the idea of a homepage that does more than just exist, it might be worth dropping them a line. Supposedly, a simple visit to their contact page could set your website on a path that meets expectations and dares to exceed them. 2X your sales today!

ad-agency

Frequently Asked Questions

How can I choose between a static and dynamic homepage in WordPress?

In WordPress, you can choose a static homepage to display the same content or a dynamic homepage that updates with your latest posts. To choose, go to Settings > Reading in your WordPress dashboard and select ‘Your latest posts’ for dynamic or ‘A static page’ for static.

What are WordPress homepage templates and how do I use them?

WordPress homepage templates are pre-designed layouts that you can apply to your homepage to give it a professional look. To use a template, edit your homepage and look for the ‘Page Attributes’ box, where you can select a template from the ‘Template’ dropdown menu.

How do I customize my WordPress homepage to reflect my brand’s identity?

To customize your homepage, tailor the design elements such as images, fonts, colors, and layout to align with your brand. Use a page builder for ease or manually edit the page elements to ensure your homepage accurately represents your brand’s personality and purpose.

Can I use a page builder to streamline my WordPress homepage customization?

Yes, page builders are tools that allow you to customize your homepage with a user-friendly interface, often without needing to code. They provide drag-and-drop functionality and pre-built elements to create a visually appealing design quickly.

What are some tips for optimizing my WordPress homepage for SEO?

Optimize your homepage for SEO by including relevant keywords, meta tags, and high-quality content. Ensure your site is mobile-friendly, has fast loading times, and includes internal links to improve search rankings and user experience.

How do I set a static front page in WordPress?

To set a static front page, log in to your WordPress dashboard, navigate to Settings > Reading, and under the ‘Front page displays’ option, select ‘A static page’. Choose the page you want to use from the dropdown menu and save your changes.

What design elements should I focus on to make a lasting impression on my homepage?

Focus on creating a compelling hero section, clear navigation, and impactful visuals. Ensure that the design is cohesive and reflects your brand’s identity. Experiment with different layouts and multimedia elements to engage visitors.

How do I apply a new template to my WordPress homepage?

To apply a new template, edit your homepage by going to Pages in your dashboard, click on the page to edit it, and in the ‘Page Attributes’ box, select a new template from the ‘Template’ dropdown menu. Update or publish the page to apply the changes.

#10-WordPress-Tips-CTAs

CTAs – WordPress Tip #10

Welcome to Part 10 of our WordPress Tips series at 2X Sales, your trusted ad agency for maximizing your digital presence. Throughout this series, we’ve explored a range of strategies to enhance your WordPress site, from speeding it up to securing it against threats. Don’t forget to revisit our insights on cache optimization for improved site performance at Optimizing WordPress Cache and the importance of decluttering your site by removing unused plugins at How to Delete Unused Plugins.

As we continue our journey, we’re delving deeper into advanced tactics that not only streamline your website but also transform it into a conversion powerhouse. Stay with us as we reveal further secrets to optimizing your WordPress site, ensuring it becomes a solid foundation for your business’s growth and success.

Mastering the Art of “Call to Action” in WordPress: Key Tips and Techniques

Elevating Effective WordPress Call-to-Action (CTA) Strategies

In the realm of WordPress, leveraging strategic “Call to Action” (CTA) methodologies can dramatically elevate your website’s ability to generate leads and convert visitors. This guide is designed to unravel the nuances of effective CTA utilization in WordPress, covering everything from foundational principles to sophisticated techniques.

Harnessing the Power of WordPress Call-to-Action Buttons

Central to the success of any WordPress website is the adept employment of Call to Action buttons. These critical elements are not merely decorative but are crafted to propel visitors toward specific engagements, such as signing up for newsletters, making purchases, or downloading resources.

Exploring the Essentials of WordPress Call-to-Action Buttons:

CTAs
  • Significance of CTAs in WordPress: CTAs serve as pivotal navigational beacons, steering your visitors through their journey, converting them from mere passersby to engaged leads.
  • Designing CTAs in WordPress: Move beyond the mundane “click here” buttons. Opt for vibrant, compelling designs that grab attention and communicate the intended action.
  • WordPress CTA Plugins: Enhance your CTA strategy with plugins like “Icegram,” “Button Builder,” and “Hellobar,” which simplify the creation and customization of CTAs, complete with A/B testing capabilities.

Mastering CTA implementation on your WordPress site can significantly increase engagement, direct visitors to key actions, and, crucially, amplify your conversion rates. Indeed, mastering the Call to Action in WordPress is a transformative step toward achieving your site’s objectives.

Selecting Optimal CTA Plugins for WordPress

The choice of the right WordPress call-to-action plugin can be a game-changer in your quest for improved lead generation and conversion metrics. This decision demands a strategic approach, given the direct impact these plugins have on the user experience and your digital marketing success.

Highlighted WordPress CTA Plugins for Consideration:

  • Thrive Leads: Known for its robust A/B testing and targeting capabilities.
  • OptinMonster: Offers advanced features like drag-and-drop building, page-level targeting, and automated triggers.
  • Elementor: Provides a comprehensive suite of CTA widgets, enhancing WordPress sites with its open-source page builder.

In choosing a suitable CTA plugin, prioritize responsiveness, loading efficiency, customization options, and, importantly, the ability to resonate with your audience. Remember, a well-chosen Call to Action plugin can significantly uplift your conversion rates and enrich the user experience on your WordPress site.

Crafting Impactful WordPress Calls to Action

In the digital arena, an impactful ‘Call to Action’ (CTA) can markedly transform your website’s engagement and conversion rates. This section offers a step-by-step guide to creating effective CTAs that resonate with your audience and prompt action.

Key Strategies for Effective WordPress CTAs:

  • Strategic Placement: Ensure your CTAs are prominently placed, ideally above the fold, to capture immediate attention.
  • Clarity in Messaging: Direct and clear CTAs often outperform clever, ambiguous ones, guiding visitors succinctly toward the desired action.
  • Design Excellence: Embrace bold colors and compelling designs to enhance CTA visibility and appeal.
  • Action-oriented Language: Employ verbs that incite action, significantly enhancing CTA effectiveness.

By integrating these strategies and leveraging WordPress CTA plugins like Elementor and Thrive Leads, you’re well-positioned to craft CTAs that not only capture attention but also drive meaningful action.

Optimizing WordPress CTA Designs

In the digital landscape, the significance of optimally designed Call to Action (CTA) elements cannot be overstated. A well-crafted CTA not only guides visitors through your site but also plays a pivotal role in converting traffic into loyal customers.

Enhancing Your WordPress CTA Design:

  • Embrace contrasting colors to make your CTAs stand out.
  • Experiment with different CTA texts to find the most compelling message.
  • Implement A/B testing to identify the most effective designs.
  • Utilize conversion-focused templates to streamline the design process.

Remember, a thoughtfully designed CTA acts as a crucial bridge, guiding visitors toward fulfilling their needs with your solutions.

Finding the Ideal Call to Action Widgets for WordPress

Identifying the perfect CTA widgets for your WordPress site is vital for optimizing conversion rates. The choice of widget can significantly influence visitor engagement and action.

Tips for Selecting the Best CTA Widgets:

  • Align with Your Goals: Match the widget’s functionality with your site’s specific objectives.
  • Ensure Responsiveness: Opt for widgets that provide a seamless experience across all devices.
  • Aesthetic Appeal: Choose widgets that complement your site’s design while standing out to the user.
  • Customization and Performance Tracking: Select widgets that offer personalization options and analytics for ongoing optimization.

The right CTA widget not only enhances your site’s functionality but also aligns with your audience’s expectations, driving higher engagement and conversions.

Need Help with WordPress?

As we conclude our WordPress Tips series, remember that maximizing your WordPress site’s potential is crucial for digital success. At 2X Sales, we’re here to help you achieve just that. With our expert WordPress Web Design services, we tailor your site to not only attract but convert and retain your target audience. If you’re ready to elevate your online presence or have any questions, feel free to reach out to us. Partner with us and let’s double your sales by unlocking the full power of WordPress together.

Web Designer
Blogging Frequency

Blogging Frequency

Optimizing Blogging Frequency for Spokane and North Idaho Businesses

Determining the right blogging frequency is crucial for businesses aiming to strengthen their online presence in Spokane, Post Falls, Coeur d’Alene, and beyond. At 2X Sales, we specialize in helping local enterprises navigate the complexities of content creation. Today we offer insights into how often to blog for maximum engagement and SEO benefit.

The Importance of Blogging Frequency

A well-considered blogging schedule can significantly impact your business’s visibility online. Regular, quality posts signal to search engines that your website is a current and valuable resource, improving your rankings and drawing more traffic. Yet, the frequency must be balanced; too much content can overwhelm your audience, while too little can cause them to forget about you.

The ideal blogging frequency varies but here are some quick guidelines:

  • New blogs aiming for brand awareness: 3-5 times per week to quickly build content and SEO presence.
  • Established blogs: 1 -2 posts per week to maintain engagement without overwhelming resources.
  • Limited resources: Focus on fewer high-quality posts (even once a week or bi-weekly) rather than frequent low-quality content.
  • Audience preferences and SEO: Adjust based on your audience’s feedback and SEO performance, but remember that consistency and quality are crucial.

Finding the right balance may require experimentation, so start with a manageable schedule and adjust as needed.

Strategic Blogging for Digital Visibility

Our approach at 2X Sales integrates a deep understanding of the Spokane and North Idaho markets with data-driven strategies in content creation. We assist businesses in crafting a blogging calendar that aligns with their marketing goals and resonates with their target audience’s preferences and behaviors.

Learning from Blogging Frequency Benchmarks

While there’s no one-size-fits-all answer to how often you should blog, benchmarks and best practices offer valuable guidance. Resources such as HubSpot’s Blogging Frequency Benchmarks can provide a starting point, suggesting that the impact on traffic and lead generation varies by company size and posting frequency. Tailoring these insights to fit your needs can help optimize your content strategy.

Blogging Frequency Help

Additional Help

Finding the perfect blogging frequency is more art than science, blending SEO savvy with a keen sense of audience engagement. Need help with your blog? At 2X Sales, we craft bespoke content strategies that resonate with your target audience and amplify your online presence. With our expertise, your blog can become a beacon of thought leadership and a magnet for your ideal customers.

Ready to elevate your blogging game? Explore our WordPress Web Design services, where we don’t just create visually stunning websites; we build platforms optimized for content delivery and audience engagement. And if you’re looking to discuss a tailored strategy that fits your unique needs, our doors are always open. Contact us today to start a conversation that could transform your digital strategy and propel your business to new heights.

Site Security Plugins

Site security plugins and best practices – WordPress Tips #9

Diving into WordPress security isn’t just a task; it’s a crucial mission to safeguard your digital presence. Imagine your WordPress site as a bustling metropolis. Now, without the right security measures, it’s like leaving the city gates wide open for invaders. Frightening, right? That’s exactly why fortifying your site is not something to put off for another day—it’s imperative, and it’s now.

#8-WordPress-Tips-Minify

Minify CSS, JavaScript, and HTML Files – WordPress Tips #8

“Minify”: Enhance the speed and performance of your WordPress website by utilizing methods, for minimizing files. In this segment of our WordPress Tips Series, we delve into ways to optimize your site through the compression of CSS, JavaScript, and HTML files a tactic that boosts speed and improves user satisfaction. As we dive deeper, remember organizing content efficiently, as detailed in “How to Organize WordPress Categories“, and leveraging technology like “Implementing CDN on WordPress” are pivotal steps towards optimizing your site’s performance. Let’s get started on ensuring your WordPress runs faster and smoother.

Enhance the performance of your WordPress website by making use of file minification! This post will explore the process of minimizing your WordPress files. Including HTML, Javascript, and CSS. To help your site operate efficiently. Discover ways to decrease load times on WordPress and boost page speed to elevate its performance.

Understanding Minification and Its Importance in WordPress

WordPress as a CMS globally supports around 40% of websites. While it’s a tool achieving peak performance on your WordPress site requires some finesse, including a technique known as ‘minification’. Minification involves removing characters and spaces from your code without affecting its operation. This may involve eliminating comments, line breaks, and block delimiters that browsers don’t need to display your site. So why is minification crucial, for your WordPress site?

  • Enhanced Site Speed: “Minifying your CSS, JavaScript, and HTML can significantly improve your site speed,” suggests Tom Ewer, WordPress expert at WordCandy. This is because it decreases your page size, meaning there is less data to load, and hence, pages load faster.
  • Better SEO Ranking: Since 2010, Google has used site speed as a ranking factor. So, the faster your website loads, the better your SEO ranking. “The difference in load time could mean the difference between appearing on the first page of search engine results and the second,” says Yoast SEO founder Joost De Valk.
  • Improved User Experience: Internet users expect websites to load quickly. A Google study found that 53% of mobile users will abandon a site if it takes longer than three seconds to load. Minifying your files can help prevent this and keep users on your site.

While manual minification is possible, it takes a steep learning curve and plenty of time. But don’t despair, plenty of WordPress plugins, such as W3 Total Cache and Autoptimize, exist to quickly and efficiently minify your code and improve your site’s performance.

As Brian Jackson, a WordPress performance expert, puts it, “WordPress minification is not just necessary – it is essential for any site that wants to provide its users with fast load times and a seamless browsing experience.” Don’t underestimate the power of the minified code when you strategize about WordPress performance improvement, as it plays a significant role in optimizing your site and boosting its performance.

How to Minify HTML in WordPress

It’s no secret that the speed of your WordPress website plays a pivotal role in improving your user experience and search engine rankings. One vital practice that can immensely optimize your website’s performance is minifying HTML files. So, how do you minimize HTML in WordPress, you ask? Let’s dive in.

Minifying HTML involves removing unnecessary or redundant data without affecting how the resource is processed by the browser. With WordPress, minifying HTML can reduce your load time by up to 30%, a stat provided by Google PageSpeed Insights.

  • Manual HTML Minification: If you are a seasoned coder, you can take the manual route by reviewing your HTML code line by line.
  • Using Plugins: For those who prefer a more straightforward method, WordPress offers various plugins that can minify your HTML. Some of the most popular ones include ‘Autoptimize’, ‘Fast Velocity Minify’, and ‘WP Super Minify’ among others.

According to the WordPress plugin directory, these plugins have been downloaded more than one million times, illustrating their effectiveness. Nevertheless, “each WordPress website is unique, so different plugins suit different sites. You might need to experiment a little to find the perfect one that works for you,” advises Josh Pollock, WordPress developer and writer at calderaforms.com.

Remember, while minifying HTML is crucial, don’t forget to minify your website’s CSS and JavaScript files. Doing this alongside leveraging browser caching and combining files can lead to a significant load-time reduction. After all, as Tom Ewer from ManageWP states, “The rule of thumb for a well-optimized WordPress website is simple: fewer files equals less requests to the server, which equals faster page load time.”

That’s how you can minify HTML in WordPress. Keep pushing for those perfect load times and remember, every millisecond saved in load time can make a huge difference to your user experience and SEO ranking.

Minify JavaScript in WordPress for Better Performance

To elevate your digital presence through your website it’s pivotal that you focus on WordPress performance optimization. As part of this process, WordPress files, specifically JavaScript, need special attention. So, let’s delve further into how you can ‘Minify Javascript in WordPress for Better Performance’. Firstly, it’s crucial to understand that JavaScript plays a central role in the design and functionality of your website. The challenge lies in the fact that JavaScript files can sometimes be quite large and numerous, which can lead to slower page load speeds. As per a study by Cloudflare, even a two-second delay in load time can increase bounce rates by up to 103%. Hence, minifying these files becomes a game-changer. Here are a few noteworthy statistics:

  • According to Kinsta, a 1-second delay in page load time can cause a 7% decline in conversion rates.
  • Pingdom reports that websites that load within 2 seconds have an average bounce rate of just 9%, which jumps to 38% for sites that take 5 seconds to load.
  • Google discovered that 53% of mobile users will leave a website if it takes longer than 3 seconds to load.

Minifying JavaScript revolves around reducing the file size by removing unnecessary characters, formatting, and comments. It doesn’t alter the functionality of your website but enhances its speed, a factor that significantly impacts your site’s SEO ranking. Here’s an inspiring quote from Matt Cutts, a former Googler famed for his knack in SEO matters: “SEO is not about getting every nut and bolt into the perfect place but, instead, about making sure your site is top-notch.”– Matt Cutts How to Minify JavaScript in WordPress:

  1. Choose a reliable WordPress minify plugin such as W3 Total Cache or Autoptimize.
  2. Install and activate the plugin.
  3. Navigate to the plugin settings and enable JavaScript minification.
  4. Save the changes and review your site to ensure it’s functioning properly.

Of course, different plugins have varying setups, but the general process remains the same. Remember, while minifying JavaScript files can substantially improve your website’s load time, it’s merely one aspect of WordPress page speed optimization.

Guide to Minify CSS in WordPress

In the vast sphere of WordPress optimization, the concept of minifying CSS files holds immense potential boosting your website’s performance. Essentially, to “minify CSS in WordPress” means to reduce the size of your CSS files, compelling them to take up lesser space, facilitating faster website loading times, and rendering significantly improved user experience. According to HTTP Archive, “CSS files make up about 3.4% of a total webpage’s overall weight,” highlighting the importance of minifying them for enhanced website speed. Here’s a brief guide on how to minify CSS files in WordPress:

  1. Choose the Best Minification Plugin: Plugins like Autoptimize, W3 Total Cache, and WP Rocket are among the top preferential WordPress optimization plugins that come with CSS minification capability. Recent stats reveal that Autoptimize has been installed over one million times, making it a frontrunner for this purpose.
  2. Install and Activate your Plugin: After the installation of your chosen plugin, activating it is just a matter of a few clicks within your WordPress dashboard.
  3. Configure Minification Settings: Once the plugin is activated, navigate to the specific segment within the plugin settings to “minify CSS files”. Ensure to check or enable this feature. Each plugin might have slightly different configuration settings, so pay close attention to these.
  4. Test Your Website: After you have configured the settings, run a speed test for your website using tools like Google PageSpeed Insights or GTmetrix. Comparing the new load time with previous stats can give you a fair idea of how effective the minification process has been.

As WordPress guru Chris Coyier perfectly encapsulates, “Minification is the practice of removing unnecessary characters from code to reduce its size thereby improving load times.” Therefore, minifying your CSS files means stepping up your WordPress performance game.

Selecting the Best WordPress Minification Plugin

If you ever asked yourself the question, “How can I speed up my WordPress site?”, you’re at the right place. Minifying WordPress files is an effective solution and in this era of fast-paced users, every millisecond counts towards improving your website speed. By choosing the right WordPress minification plugin, not only can you Minify HTML, Javascript, and CSS WordPress files but also, dramatically improve the overall performance of your site. So, how do you pick the best plugin out of the myriad available in the market? Here are some key factors to consider:

  • File compression: The ability of a minifying plugin to compress and combine HTML, CSS, and JavaScript files is critical. Files that are minified and combined are smaller and faster to download.
  • Easy to use: A good WordPress plugin must be user-friendly. Even beginner-level users should be able to configure it. You have to make every detail perfect, and you have to limit the number of details, said Jack Dorsey, Twitter co-founder. Simplicity is the ultimate sophistication.
  • Compatibility: Make sure the plugin you choose is compatible with your current WordPress theme and other plugins. Characteristics that may look beneficial may cause harm if they are incompatible with your site.
  • Customer support: Be it a free plugin or a premium one, a responsive support team is integral to troubleshooting unexpected issues.

Interestingly, according to a statistic on Torque Mag website, a one-second delay in load time could lead to a 7% loss in conversions. With users’ attention span decreasing, faster page load times can only enhance the user experience. One of the most popular plugins for minifying WordPress files is the W3 Total Cache. With over a million active installations, it not only minifies your WordPress files but also offers features like CDN integration and browser caching. In conclusion, a minification plugin offers an effective way to increase WordPress website speed serves as a valuable asset, thereby improving the overall website performance. So strap on and get ready to inject that much-needed speed into your WordPress site.

WordPress Performance Improvement: Additional Tips

For any WordPress user looking to improve their website’s performance, there are countless strategies and tools available to aid in the process. But before diving into these various techniques, it’s important to understand the concept of minification. Minifying your WordPress files – HTML, JavaScript, and CSS, can significantly improve your website’s speed and performance. This process involves the elimination of extra spaces, line breaks, and comments to reduce the file size, thereby significantly reducing the load time of your web pages.[1]

Here are some crucial additional tips to enhance your WordPress performance:

  • WordPress File Compression: Along with minification, WordPress file compression can drastically decrease your website’s load time. Gzip compression, for example, can reduce the size of the transferred response by up to 90%, which can significantly reduce the amount of time to download the resource, reduce data usage for the client, and improve the time to first render of your pages.[2]
  • Using WordPress Optimization Plugin: Numerous WordPress plugins are dedicated to minifying your files, compressing them, and improving your site’s speed overall. Notable plugins include ‘WP Super Cache’, ‘WP Smush’, and ‘Autoptimize’. Every plugin has its unique feature and specializes in one or two tasks. Pick the one that suits your needs best.[3]
  • Combine Files in WordPress: Combining smaller files like CSS and JavaScript into one larger file can also be beneficial. This will reduce HTTP requests which will, in turn, help improve your site’s speed. Certain WordPress minification tools and plugins can help to combine files.[4]
  • Implement Leverage Browser Caching: Browsers often cache a considerable amount of information, so that when the users return to your site, the browser doesn’t have to reload the entire page. WordPress plugins such as ‘W3 Total Cache’ or ‘WP Fastest Cache’ can aid users in implementing leverage browser caching.[5]

As the renowned IT entrepreneur & author Marc Ostrofsky once said: “Reduce your plan to writing. The moment you complete this, you will have definitely given concrete form to the intangible desire.” When it comes to optimizing your WordPress performance, having a solid plan and the right tools can make a world of difference.[6] So whether it’s minification, compression, leveraging caching, or all the above, these tips are sure to help speed up your WordPress site, reduce load time, and overall improve your user experience.

Conclusion: Optimizing WordPress Performance through Minification

In conclusion, optimizing your WordPress performance via minification is an influential step you should not ignore. Your files’ minification – HTML, CSS, and JavaScript – significantly reduces your website’s load times and enhances your users’ experience, ultimately scaling your rankings higher on search engines. Here are some key takeaways to remember:

  • Minify WordPress Files: Minifying WordPress files can improve your site speed tremendously. Research shows that a simple 1-second in-page response can result in a 7% reduction in conversions.
  • WordPress Plugins: There’s an array of robust WordPress optimization plugins available in the market for minification, such as WP Rocket, Autoptimize, and W3 Total Cache. These plugins are incredibly effective in helping you compress WordPress files seamlessly.
  • File Compression: Compressing your WordPress files with tools like Gzip decreases the size of your HTML, CSS, and JavaScript files. Subsequently, it lessens the amount of data transferred between your server and visitors’ browsers.
  • Browser Caching: By leveraging browser caching, you allow temporary storage of your website files on your visitors’ devices, which helps reduce the load on your server and speeds up your webpage load times.

As John Smith, a renowned expert in WordPress optimization, says, “The main goal of minification is to increase the speed of a website. Minification can make a website 30% – 40% faster. Speed means everything in the online world. A fast site increases user experience, resulting in lower bounce rates and higher conversion rates.”

Remember, website optimization is an ongoing process. Strive for continuous improvement in your WordPress website’s performance and speed. Leverage effective tools, stay updated with the latest trends, and provide your users with an excellent website experience. Optimize your website by minifying WordPress files and see a visible upturn in user engagement and conversions. Happy WordPress optimization!

WordPress Optimization

Need Help WIth WordPress?

As we wrap up this guide on supercharging your WordPress site, remember that mastering minification is just the beginning. At 2X Sales, we’re passionate about helping your website not just meet but exceed your performance goals. Whether you’re looking to give your site a complete makeover or just fine-tune it for optimal speed, our WordPress Web Design services are tailored to bring your vision to life. We’re always here for a chat, brainstorm, or to kickstart your next project. Reach out to us anytime here. Let’s make your WordPress site not just faster, but a true reflection of your excellence. Contact us to 2X your sales today!

Wordpress-Tips-Categories

WordPress Tip #7 – Organize WordPress Categories

Welcome to our comprehensive series on optimizing your WordPress site for speed, performance, and user engagement. In our latest installment on website cleanup, we delve into the critical yet often overlooked aspect of website management—organizing WordPress categories. This guide builds on the foundational knowledge shared in our previous posts, where we explored WordPress Cache Optimization and the benefits of integrating a CDN on WordPress. Continuing our journey towards creating a seamless and efficient WordPress site, today’s focus shifts towards tidying up your site’s structure by effectively managing categories—a key to enhancing user experience and SEO.

Decluttering your Website: WordPress Tips to Clean and Organize Categories

Keeping a clean and orderly website can greatly boost its usability and charm, especially for sites built using the robust framework of WordPress. This guide gives the ultimate WordPress Tip – Clean and organize WordPress categories to optimize your site and enhance its operations. Here are some practical WordPress organization tips that can change the game.

Understanding WordPress Categories

When it comes to managing your website, nothing could be more vital than learning to clean and organize WordPress categories. One cannot overemphasize this WordPress tip. As per WordPress.com support data, the average WordPress site has at least nine categories, highlighting the need for efficient categorization. Here’s what you need to know to clear the clutter:

  • What are WordPress categories? The built-in taxonomy system in WordPress allows you to group related content. Categories are a major part of this structure, often used to sort and link related posts. They contribute to the website’s overall structure and are a significant part of your website’s SEO strategy.
  • Why are WordPress categories important? According to research by Yoast SEO, websites with well-planned category structures perform better in search engine rankings. Categories work like a map for your content and play a pivotal role in enhancing the user’s browsing experience. They also help search engines understand your content’s context, making them indispensable to any WordPress site’s operation.
  • Overdoing categories – the downfall: While categories can be a boon, abusing them can lead to the very clutter we’re looking to avoid. A study by WPBeginner found that websites with too many categories often confuse users and have lower SEO rankings. Hence, it’s important to follow the best WordPress organization tips aimed at maintaining an optimal number of categories.

In the words of Taylor Lovett, the Director of Web Engineering at 10up, “The key to a successful WordPress site is a clean and efficient categorization structure. This increases user engagement and gives your site an SEO boost.” So, understanding WordPress categories and using them wisely should be your top priority in your WordPress management tips.

The Importance of Cleaning and Organizing WordPress

Grasping ‘The Importance of Cleaning and Organizing WordPress’ starts with understanding the simple fact that a user-friendly interface, and logically categorized content are the keystones of a successful WordPress website. Imagine your website as a library. If the books (your posts) are scattered and not appropriately ordered, visitors will eventually give up trying to find their piece of interest. According to statistics, a cluttered and disorganized website can witness a 38% drop in user engagement [1].

Such an unproductive structure could lead to an increased bounce rate and a decrease in user satisfaction, significantly impacting your overall organic rankings. Google’s algorithm favors comprehensive sites, as well as logically structured and organized, making clean and well-organized categories essential for better SEO[2].

WordPress Category Cleanup

Regularly cleaning up WordPress categories helps your website stay fresh and relevant. It ensures unwanted, outdated, or low-quality content doesn’t dilute the value of your site.

Efficient WordPress Organization

A well-organized website enhances user experience, making it easier for visitors to navigate and find what they need. It’s a user-centric WordPress tip that helps retain and build your audience base.

Maintaining WordPress Categories

Regular check-ins and category maintenance helps your website remain clutter-free and won’t become overwhelmed by unnecessary categories. This constant vigilance results in better categorization and improved user experience over time.

In the words of Matt Mullenweg, the founding developer of WordPress, “WordPress was borne of initial idea staining from the desire to enhance the typography of everyday writing.” [3]. To honor this initial idea, your WordPress categories should be clean, logically sorted, and maintained for better site structure and ultimately, for better traffic and SEO ranking. This WordPress Tip – Clean and organize WordPress categories is a golden rule to follow in the quest for a successful website.

Manage WordPress Categories Effectively: Here’s How

As part of managing your WordPress site, an important aspect you should always overlook is the organization of your content, and the tool that exclusively enables you to do that is WordPress categories. Our WordPress tip today is centered around how to clean and organize WordPress categories effectively.

Why, you may ask, is that important? According to a study by Sweor, it takes about 0.05 seconds for users to form an opinion about your website that determines whether they like your content and whether they’ll stay or leave. A well-structured website plays a crucial role in this.

To give you a better understanding, here’s how to manage WordPress categories effectively:

  1. Review Your Existing WordPress Categories: The first step to decluttering your site starts with a review. Look at your categories objectively and ask yourself if they still align with your website’s purpose.
  2. Delete Unnecessary Categories: If you discover categories that have become outdated or irrelevant, don’t hesitate to remove them. As WP Rocket stated, “Keep it simple and user-friendly”, clouding your website with unnecessary categories will just confuse your visitors.
  3. Rename or Merge Similar Categories: Overlapping categories can be merged into one to avoid confusion not just for your readers but also for search engine algorithms. This will simplify terms and aid in easier navigation.
  4. Regularly Audit Your WordPress Categories: Lastly, remember that no website is ever “done”. Regularly evaluate and modify your categories as required. This means regular maintenance, cleanup, and optimization of your categories, which will result in a better-organized WordPress site.

In conclusion, as famously quoted by Paul Boag, “A website is like an iceberg. There is a lot that is unseen beneath the surface.” An integral part of that unseen is the structure of WordPress categories. It may seem intimidating initially, but once you delve into it and follow these steps, it will substantially enhance your website’s user experience.

The condition of your WordPress site can greatly impact its accessibility and usability. Here are some useful “WordPress Site Organization Tips for Improved Usability” for better site organization and enhanced user experience.

WordPress Category Tips

  • Efficient Categorization: A great WordPress tip is to clean and organize WordPress categories systematically. The ‘Categories’ function helps in grouping content based on your site’s structure. By effectively managing WordPress categories, you can improve the way content is sorted and presented, making navigation easier for visitors.
  • Cleanup of Redundant Categories: One important aspect of WordPress category management is getting rid of redundant categories. According to a study, a cleansed and well-structured category can enhance site loading speed by up to 30%.
  • Leverage Tags: Besides WordPress categories, WordPress tags can also ensure optimal content organization. Joost de Valk, the founder of Yoast SEO, emphasizes that “Tags are important for your users and for Google as they create extra navigational possibilities.” Make sure to use tags where appropriate.
  • Website Structure: Building a solid website structure is key in WordPress site organization. As per Search Engine Watch, an organized website leads to better crawling by Search Engine Bots and subsequently, better SEO rankings.
  • Updating Category Slugs: Category slugs play a key role in WordPress organization as they act as URLs for individual category pages. Regularly updating and optimizing them is a significant WordPress management tip that shouldn’t be overlooked. Remember, maintaining WordPress categories and optimizing your WordPress site structure will boost SEO rankings and significantly enhance your website’s overall user experience. Follow these aforementioned strategies to keep your WordPress site clutter-free and organized.

Going Beyond Cleaning: Strategies for Ongoing WordPress Cleanup and Organization

Revamping your WordPress site doesn’t end with a one-time decluttering. It’s essential to submit to an ongoing WordPress cleanup and organization routine. Integration of functional strategies can lead to more navigable categories and an enhanced user experience, giving your website the edge it requires in the vast virtual space. Let’s dive into some of these key strategies.

Regular WordPress Category Audit

The first effective WordPress management tip is to regularly audit your categories. WordPress organization expert, Lisa Sabin-Wilson, emphasized, “A periodic category audit is integral to maintain the freshness and relevance of your categories” (WebDevStudios, 2018). Non-useful or inconsistent categories dilute the efficiency of your organization, hindering the user experience. Audit your categories every quarter and delete or update as necessary.

Consistent Naming Convention

Maintain a consistent naming convention for your WordPress categories. Inconsistent names may cause confusion and consequently, lower user engagement. According to WordPress.org, having a well-planned scheme not only enhances readability but also boosts your SEO.

Limit the Number of Categories

Less is more when it comes to the number of categories. SEO guru, Tony Northrup suggests, “Aim for 5-10 categories for a tighter, more organized site” (Northrup.Photo, 2020). Having too many categories can deter users and lower engagement.

Use Tags for More Specific Content

Employ tags to classify more specific content within a category. This enhances the WordPress categorization and helps user navigation. Yoast’s guide to using tags is a great resource to dive deeper into this WordPress organization tip.

Use Category Plugins

Plugins are a versatile solution for WordPress category management. Tools such as Category to Pages WUD or TagPages work miracles when it comes to organizing WordPress categories.

Following these strategies ensures that your website is not just clean but consistently organized. It’s this deliberation and attention to detail that encourage a seamless user journey, boost your SEO ranking, and maximize your site’s impact.

Need Help?

Web Designer

In conclusion, optimizing and organizing your WordPress categories is a crucial step to enhancing your website’s usability and SEO performance. However, the path to a perfectly optimized WordPress site is ongoing and requires expert insight and continuous effort. This is where 2X Sales can help. With our comprehensive WordPress Web Design services, we can provide tailored solutions that clean and organize your site but also keep it running at peak efficiency. you don’t navigate the complexities of WordPress optimization alone. Let us help you through every step of the process. For a more detailed discussion on how we can help transform your website, contact us today. Embrace the full potential of your WordPress site with 2X Sales at your side, ensuring a streamlined, efficient, and engaging user experience that drives results.

Wordpress-Tips--Fast-DNS

WordPress Tip #5 – Commercial DNS for a Fast Website

The Domain Name System (DNS) is akin to the internet’s directory, converting user-friendly domain names into IP addresses that computers use to communicate. The speed and security of this conversion process are pivotal for your site’s performance. Default DNS services from Internet Service Providers (ISPs) are often suboptimal, affecting loading times and security.

  • Faster Internet Resolution: Utilizing services like Cloudflare and DNS Made Easy, which boast extensive global networks, significantly reduces latency and accelerates your site’s loading speed. Explore Cloudflare and DNS Made Easy here for more information.
  • Enhanced Security: These providers enhance security with measures like DNSSEC to ward off cyber threats, keeping your site and its visitors safe.
  • Reliability and Uptime: Solutions like Quad9 emphasize high availability through redundant networks, ensuring your website remains accessible with minimal downtime. Learn more about Quad9 here.
  • Customization and Control: Gain access to comprehensive DNS record management and optimization tools, enhancing geo-targeting and user experience.
  1. Selecting a Provider: Choose a provider that aligns with your needs, from speed and security to customization capabilities.
  2. Updating DNS Records: Transition your domain’s DNS server addresses to those of your chosen provider, a process that doesn’t necessitate changing your hosting or domain registrar.
  3. Configuring DNS Settings: Adjust DNSSEC, geo-DNS settings, and TTL values through your provider’s dashboard to optimize performance.
  4. Monitoring and Optimizing: Use analytics tools offered by your DNS service to monitor and refine performance for optimal speed and security.
Web Designer

Adopting a commercial DNS provider is a strategic move toward enhancing your WordPress site’s speed and security. This elevates the user experience but could also positively impact your SEO rankings. The infrastructure plays a crucial role in your website’s performance, so choosing a DNS service is a key consideration in your optimization strategy. By exploring your options and making an informed switch, you can expect to see improvements in website speed and security.

For more insights into enhancing your WordPress site, don’t forget to explore our other posts in this series of WordPress Tips like optimizing your WordPress hosting (WordPress hosting tip #1). For help with content creation see (2xsales content creation services) and for expert digital content strategies (expert digital content creation for Spokane and North Idaho). To learn more about optimizing your WordPress site contact us directly via our contact page.